“
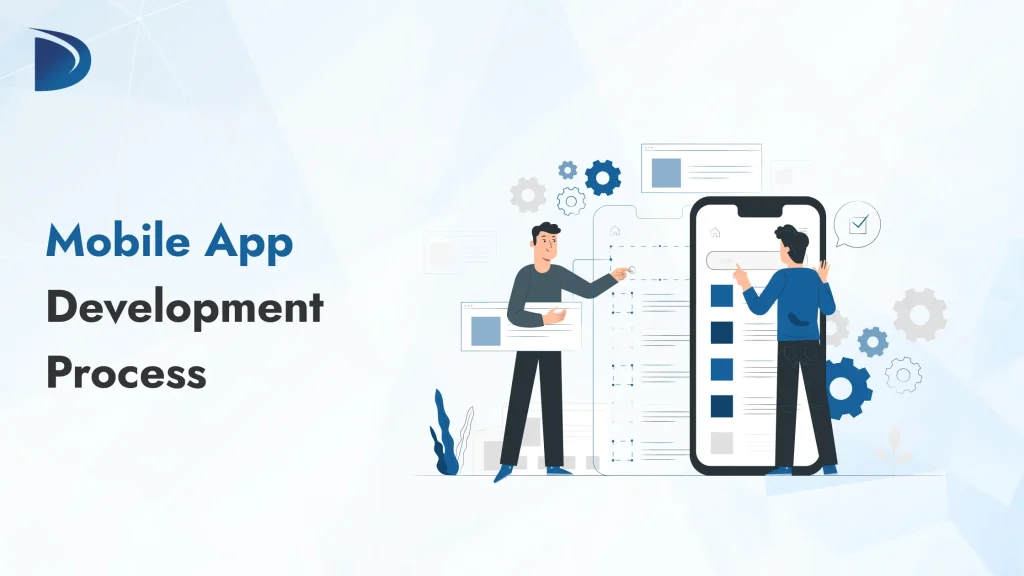
The mobile app development process is a step-by-step process of turning an app idea into a working product. It usually includes idea validation, requirements and MVP planning, platform and technology selection, UI/UX design, development, testing, app store launch, and ongoing maintenance. A clear process helps businesses reduce risks, control costs, launch faster, and build an app that meets user needs.
Building a mobile app takes more than writing code. A successful app starts with a clearly defined problem, the right target users, and a plan for how the product will work and grow.
The mobile app development process takes an idea through research, planning, UI/UX design, development, testing, launch, and ongoing improvement. Each stage helps reduce risk and makes it easier to build an app people want to use.
Whether you are building a new product, improving an existing service, or creating an internal business app, understanding the development process helps you make better decisions about features, technology, budget, and timeline.
In this guide, we explain the mobile app development process step by step: what happens at each stage, what you should expect from your development team, and what you should have in place before moving to the next stage.
Mobile App Development Process at a Glance
A typical mobile app development lifecycle includes these stages:
Define the problem and validate the idea
Gather requirements and plan the MVP
Choose the platform and technology
Create the UI/UX design
Plan the technical architecture
Develop the mobile app
Test and improve the app
Launch on the App Store and Google Play
Monitor, maintain, and improve the app
These stages are not always strictly separate. Design, development, and testing often happen in short cycles, especially when a team uses Agile development.
The important part is that every stage has a clear goal and a useful outcome.
Define the Problem and Validate the App Idea
The first step is not coding, it is understanding the problem your app should solve.
A good app starts with a real user need. Before investing in design and development, make sure you understand who the app is for, what problem it solves, and why people will use it.
Define the problem
Start with simple questions:
What problem does the app solve?
Who experiences this problem?
How do they experience it?
How do people solve it today?
How often does the problem occur?
What makes the problem frustrating or costly?
What would a better solution look like?
Try to describe the problem in one clear sentence.
For example:
“Small businesses need a faster way to track field service jobs without relying on paper forms or phone calls.”
This gives the development team a clear problem to solve instead of starting with a random list of features.
Understand your users
Research your target users before deciding what to build.
Look at:
Their goals
Common tasks
Pain points
Devices they use
Technical comfort level
Location and language needs
How they currently complete the task
User interviews, surveys, customer support data, sales feedback, and product analytics can all help.
Research competing apps
Study apps that already solve the same or a similar problem.
Look at:
App features
User flows
Pricing
Ratings and reviews
Common complaints
Onboarding
Navigation
Performance
Support options
Do not copy competitors. Look for gaps.
For example, users may like an app’s core service but complain about slow checkout, poor search, confusing navigation, or missing notifications. Those problems can help shape your product.
Validate the idea before building everything
You do not always need a complete app to test an idea.
Depending on the product, you can use:
User interviews
Surveys
Landing pages
Clickable prototypes
Product demos
Waitlists
Small pilot programs
The goal is to learn whether the problem is real before spending heavily on development.
Output of this stage
You should have:
A clear problem statement
A defined target audience
Competitor research
Key user needs
A basic product idea
Initial success goals
Gather Requirements and Define the MVP
Once the idea is validated, turn it into clear product requirements. This is where many app projects either become focused or become too large.
A common mistake is trying to build every possible feature in the first release. Instead, define an MVP (Minimum Viable Product).
An MVP is the smallest useful version of the app that can solve the main user problem and generate real feedback.
Define the core features
Separate features into groups such as:
Must have
Features required for the first release.
Should have
Useful features that can improve the product but are not required for launch.
Could have
Features that may be added later.
Future
Ideas that need more research or may not be needed.
For example, an e-commerce MVP may need:
Account creation
Product browsing
Product search
Shopping cart
Checkout
Order tracking
Advanced loyalty programs, social features, and personalized recommendations may come later.
Create user stories
User stories help the team understand what users need to do.
For example:
“As a customer, I want to save my delivery address so I can complete checkout faster.”
Each user story should have clear acceptance criteria so the team knows when the feature is complete.
Define business requirements
Also document:
Business goals
Revenue model
User roles
Required integrations
Data requirements
Security needs
Legal or compliance requirements
Reporting needs
Supported devices
Target launch date
Create a product roadmap
The roadmap should show:
What will be built first
What will come later
Major milestones
Dependencies
Release goals
The roadmap should be flexible. User feedback and technical findings may change priorities.
Output of this stage
You should have:
Product requirements
MVP feature list
User stories
User flows
Product roadmap
Initial project scope
Success metrics
Choose the Platform and Technology
The next step is deciding where the app will run and how it will be built.
This approach can reduce duplicated development work and can be a good fit when the iOS and Android versions share most of the same product experience.
How should you choose?
Consider:
Target users
Required platforms
App performance
Device features
Development budget
Development timeline
Team skills
Long-term maintenance
Existing systems and APIs
There is no single technology that is best for every mobile app.
The right choice depends on the product requirements.
Many mobile teams use Agile development and build the product in short sprints.
A typical cycle looks like:
Plan → Build → Test → Review → Improve → Repeat
This allows the team to identify problems early instead of waiting until the entire application is finished.
Set up source control and CI/CD
Professional development teams should also use tools and processes for:
Source code management
Code reviews
Automated builds
Automated tests
Development environments
Staging environments
Release builds
Continuous integration and continuous delivery (CI/CD) can reduce release errors and make future updates easier.
Output of this stage
You should have:
Working app features
Backend services
APIs
Database
Integrations
Development and staging builds
Code reviewed and stored in version control
Test the App and Fix Problems
Testing should happen throughout development, not only before launch.
The goal is to make sure the app works correctly, protects user data, performs well, and provides a good experience.
Functional testing
Check that every feature works as expected.
For example:
Can users create an account?
Can they sign in?
Does search return the right results?
Does checkout work?
Are notifications sent correctly?
Are errors handled properly?
Device and compatibility testing
Test supported:
Phones
Tablets, if applicable
Screen sizes
Operating system versions
Network conditions
An app that works on one device may behave differently on another.
Usability testing
Give the app to real users and watch how they use it.
Look for:
Confusing screens
Difficult navigation
Unclear instructions
Unexpected behavior
Tasks that take too many steps
Performance testing
Check:
App startup time
Screen loading
API response time
Memory use
Battery impact
Network performance
Behavior under higher traffic
Security testing
Check for issues involving:
Authentication
Authorization
Data storage
APIs
Encryption
Sessions
Input validation
Sensitive information
Accessibility testing
Make sure users with different needs can use the app.
User acceptance testing
Before launch, business stakeholders or selected users should test the final release.
This is often called UAT (User Acceptance Testing).
Fix, retest, and repeat
Finding a bug is only the first part.
The team should:
Find → Fix → Test → Retest → Approve
Output of this stage
You should have:
Tested release candidate
Bug list
Resolved critical issues
Performance results
Security checks
UAT approval
Prepare and Launch the App
Once testing is complete, the app is prepared for release.
This stage includes more than uploading a file to an app store.
Prepare the App Store listing
For iOS, prepare the required information for Apple App Store submission.
For Android, prepare the listing for Google Play.
Typical store assets include:
App name
App description
App icon
Screenshots
Promotional assets where required
Category
Contact information
Privacy information
Age or content rating information
Prepare the production environment
Before launch, confirm:
Production APIs are working
Database is ready
Monitoring is active
Analytics are configured
Push notifications work
Payments work
Support channels are ready
Privacy policy is available
Backup and recovery processes are in place
Use beta testing
Do not make the first public release the first time real users see the app.
Use appropriate testing programs before launch.
For iOS, Apple provides TestFlight for beta testing. Google Play also provides testing tracks for Android apps.
Submit for review
Both Apple and Google have requirements that can change over time.
Review current platform requirements before submission.
Apple reviews apps for areas including functionality, privacy, security, and other App Store requirements.
Google Play also has current target API requirements that developers must meet when submitting new apps and updates.
Plan the launch
A good launch should include:
Release plan
Support plan
Monitoring
Marketing page
Customer communication
App Store optimization
Analytics
The technical launch and marketing launch should support each other.
Output of this stage
You should have:
Production-ready app
App Store listing
Google Play listing, if applicable
Approved release
Analytics and monitoring
Launch and support plan
Monitor, Maintain, and Improve the App
The mobile app development process does not end when the app goes live.
Post-launch work is where you learn how people actually use the product.
Monitor app performance
Track:
Crashes
App errors
Slow screens
API failures
Failed payments
Login problems
Device-specific issues
Track product metrics
The right metrics depend on the app, but may include:
Downloads
Sign-ups
Activation rate
Daily and monthly active users
Retention
Conversion rate
Session length
Feature usage
Revenue
Customer support requests
Do not track every possible metric.
Choose the numbers that connect to your business and product goals.
Collect user feedback
Use:
App reviews
Surveys
Customer support
In-app feedback
Interviews
Product analytics
Look for repeated problems rather than reacting to every individual request.
Release updates
Regular updates may include:
Bug fixes
Security updates
Performance improvements
OS compatibility updates
New features
UX improvements
Both iOS and Android continue to evolve, so apps need ongoing technical maintenance.
Improve the product
Use real user data to decide what to improve next.
A useful cycle is:
Measure → Learn → Prioritize → Build → Test → Release → Measure again
This turns the mobile app into an ongoing product instead of a one-time project.
How Long Does It Take to Develop a Mobile App?
The time needed to develop a mobile app depends on its features, complexity, platforms, and technical requirements. A simple MVP may take 6–12 weeks, while a medium or complex app can take 3–6 months or longer. Large enterprise apps may take 9–18 months or more.
The timeline can also change based on UI/UX design, third-party integrations, security needs, testing, team size, and the number of platforms you support. Defining a clear MVP and project scope early can help reduce delays and create a more accurate timeline.
As a general planning guide:
App type
Typical timeline
Simple MVP
6–12 weeks
Medium-complexity app
3–6 months
Complex business or consumer app
6–12+ months
Large enterprise app
9–18+ months
These are planning ranges, not guarantees.
A smaller MVP can often be released earlier and expanded based on real user feedback.
The best way to estimate a project is to define the scope first and then estimate the work required for each feature.
What Affects Mobile App Development Cost?
The cost of mobile app development depends on more than the number of screens.
Key factors include:
App complexity
A basic information app costs less to build than an app with payments, real-time tracking, AI features, or complex workflows.
Number of platforms
Building for both iOS and Android may require more work than building for one platform, depending on the technology approach.
Features
Common cost drivers include:
User accounts
Payments
Real-time messaging
Maps
Video
Push notifications
AI
Offline functionality
Advanced search
Third-party integrations
UI/UX requirements
Custom animations, advanced interactions, and complex user flows can increase design and development work.
Backend requirements
A simple backend is different from a system that needs complex business rules, high traffic, multiple integrations, and large amounts of data.
Security and compliance
Apps handling financial, health, business, or other sensitive information may need additional security and compliance work.
Maintenance
The budget should also account for post-launch maintenance, monitoring, updates, and future development.
The best way to control cost is not to cut testing or security. It is to define the MVP clearly and avoid building features before they are needed.
Native vs. Cross-Platform App Development
Choosing between native and cross-platform development depends on the product.
Factor
Native
Cross-platform
Platforms
Built separately for each platform
Shared codebase for multiple platforms
Performance
Excellent
Very good for many apps
Platform-specific features
Strong
Depends on framework and feature
Code sharing
Limited
High
Development approach
Platform-specific
Shared development
Best for
Highly platform-specific apps
Products targeting multiple platforms
Native development may make sense when the product depends heavily on platform-specific features or needs the highest level of platform control.
Cross-platform development can be a strong option when the product needs iOS and Android versions with similar functionality.
The right choice should be based on the product, not simply on which technology is popular.
Common Mobile App Development Mistakes
A strong development process also means knowing what to avoid.
Building too many features
Trying to build everything in version one increases cost, complexity, and launch time.
Start with the features needed to solve the main problem.
Skipping user research
A technically excellent app can still fail if it solves the wrong problem.
Talk to users before making major product decisions.
Designing only the happy path
Do not design only the screen where everything works.
Also design:
Empty states
Loading states
Errors
Failed payments
Offline states
Permission requests
Password recovery
Account deletion
These are part of the real user experience.
Leaving testing until the end
Late testing makes problems more expensive to fix.
Test throughout development.
Ignoring security
Security should be part of the architecture from the beginning.
Choosing technology before understanding the product
Do not choose Flutter, React Native, native iOS, or native Android simply because someone recommends it.
Start with product requirements.
Treating launch as the finish line
The first release gives you new information.
Use that information to improve the product.
What Should You Expect From a Mobile App Development Company?
If you hire a mobile app development company, you should know what you are paying for.
A professional development partner should help with more than coding.
Depending on the project, the process may include:
Product discovery
Requirements gathering
Project planning
UI/UX design
Technology selection
Technical architecture
Mobile development
Backend development
API integration
Quality assurance
Security testing
App Store and Google Play preparation
Deployment
Analytics
Maintenance
Post-launch support
You should also expect clear communication about:
Project scope
Timeline
Deliverables
Assumptions
Risks
Changes
Testing
Launch readiness
Before development starts, make sure you understand what is included and what happens if the scope changes.
Mobile App Development Process: A Simple Checklist
Before starting:
Define the problem
Identify target users
Research competitors
Validate the idea
Define business goals
Define the MVP
Prioritize features
Choose platforms
Select the technology approach
Create user flows
Design wireframes
Build a prototype
Finalize UI/UX
Plan the technical architecture
Plan security
Build the app
Test on real devices
Complete UAT
Prepare store listings
Run beta testing
Submit the app
Launch
Monitor performance
Collect feedback
Release improvements
Conclusion
The mobile app development process is not simply a sequence of design, coding, testing, and launch.
It is a product journey that starts with understanding a real problem and continues through research, planning, design, development, testing, release, and ongoing improvement.
The strongest app projects share a few habits:
They solve a clear user problem.
They validate important assumptions early.
They keep the first release focused.
They choose technology based on product needs.
They test throughout development.
They plan security and scalability early.
They use real user feedback after launch.
They treat maintenance as part of the product lifecycle.
A clear process does not remove every risk, but it makes those risks easier to find and manage.
If you are planning a new mobile app or improving an existing one, Differenz System can help with strategy, UI/UX design, mobile app development, testing, deployment, and ongoing support.
Have an app idea? Talk to our mobile app development team to discuss your goals, users, features, and the best approach for your project.
Frequently Asked Questions
What is the mobile app development process?
The mobile app development process is the complete process of turning an app idea into a working product. It usually includes idea validation, requirements, MVP planning, technology selection, UI/UX design, development, testing, deployment, and ongoing maintenance.
What are the main stages of mobile app development?
The main stages are:
Idea validation
Requirements and MVP planning
Platform and technology selection
UI/UX design
Technical architecture
Development
Testing and QA
Deployment
Maintenance and improvement
The exact process may vary by project.
How much does it cost to develop a mobile app?
There is no fixed price for mobile app development. Cost depends on the app’s features, complexity, platforms, UI/UX requirements, backend, integrations, security needs, and development timeline. Defining the MVP is one of the best ways to create a clear estimate.
Should I build a native or cross-platform app?
It depends on your requirements. Native development can be a strong choice when you need deep platform integration or platform-specific performance. Cross-platform development can work well when you want to support iOS and Android with a shared codebase.
What is an MVP in mobile app development?
An MVP, or Minimum Viable Product, is the first useful version of an app with the core features needed to solve the main user problem. The goal is to launch a focused product, learn from users, and improve it over time.
What programming languages are used for mobile app development?
Common choices include Swift for iOS and Kotlin for Android. Cross-platform development may use technologies such as Flutter or React Native. The best technology depends on the app’s requirements and long-term goals.
What happens during mobile app testing?
Testing checks whether the app works correctly and provides a good user experience. It can include functional, usability, compatibility, performance, security, accessibility, and user acceptance testing.
What happens after a mobile app is launched?
After launch, the team monitors performance, reviews user feedback, fixes bugs, releases updates, improves features, and keeps the app compatible with new operating system versions.
Can a mobile app be updated after launch?
Yes. Mobile apps are normally updated throughout their lifecycle. Updates can fix bugs, improve performance, add features, address security issues, and support new versions of iOS and Android.
What should I prepare before hiring a mobile app development company?
Start with the problem you want to solve, your target users, business goals, key features, preferred platforms, required integrations, and expected timeline. You do not need to have every technical detail figured out before speaking with a development team.
Is UI/UX design part of mobile app development?
Yes. UI/UX design is an important part of the mobile app development process. It covers user flows, wireframes, prototypes, visual design, navigation, accessibility, and the overall experience users have with the app.
Ketan Sodvadiya is an experienced Project Manager with over 9 years in mobile application development. He has a strong background in team leadership and project management, including expertise in requirement analysis, project estimation, delivery planning, and client communication. Ketan excels at coordinating teams and ensuring successful project delivery through careful planning and clear communication.


 Vidhi Vaishnav
 Vidhi Vaishnav
 Shyam Agarwal
 Krunal Pawar